¶ Phishing Campaigns
The Phishing Campaigns section is the central hub for creating, managing, and monitoring your phishing simulation campaigns. Access it by clicking the first icon in the left sidebar.
This section contains three tabs:
- Campaigns — list and manage all campaigns
- Dashboard — view your organization's security score
- Advanced dashboard (beta) — embedded analytics with detailed charts
¶ Campaigns List
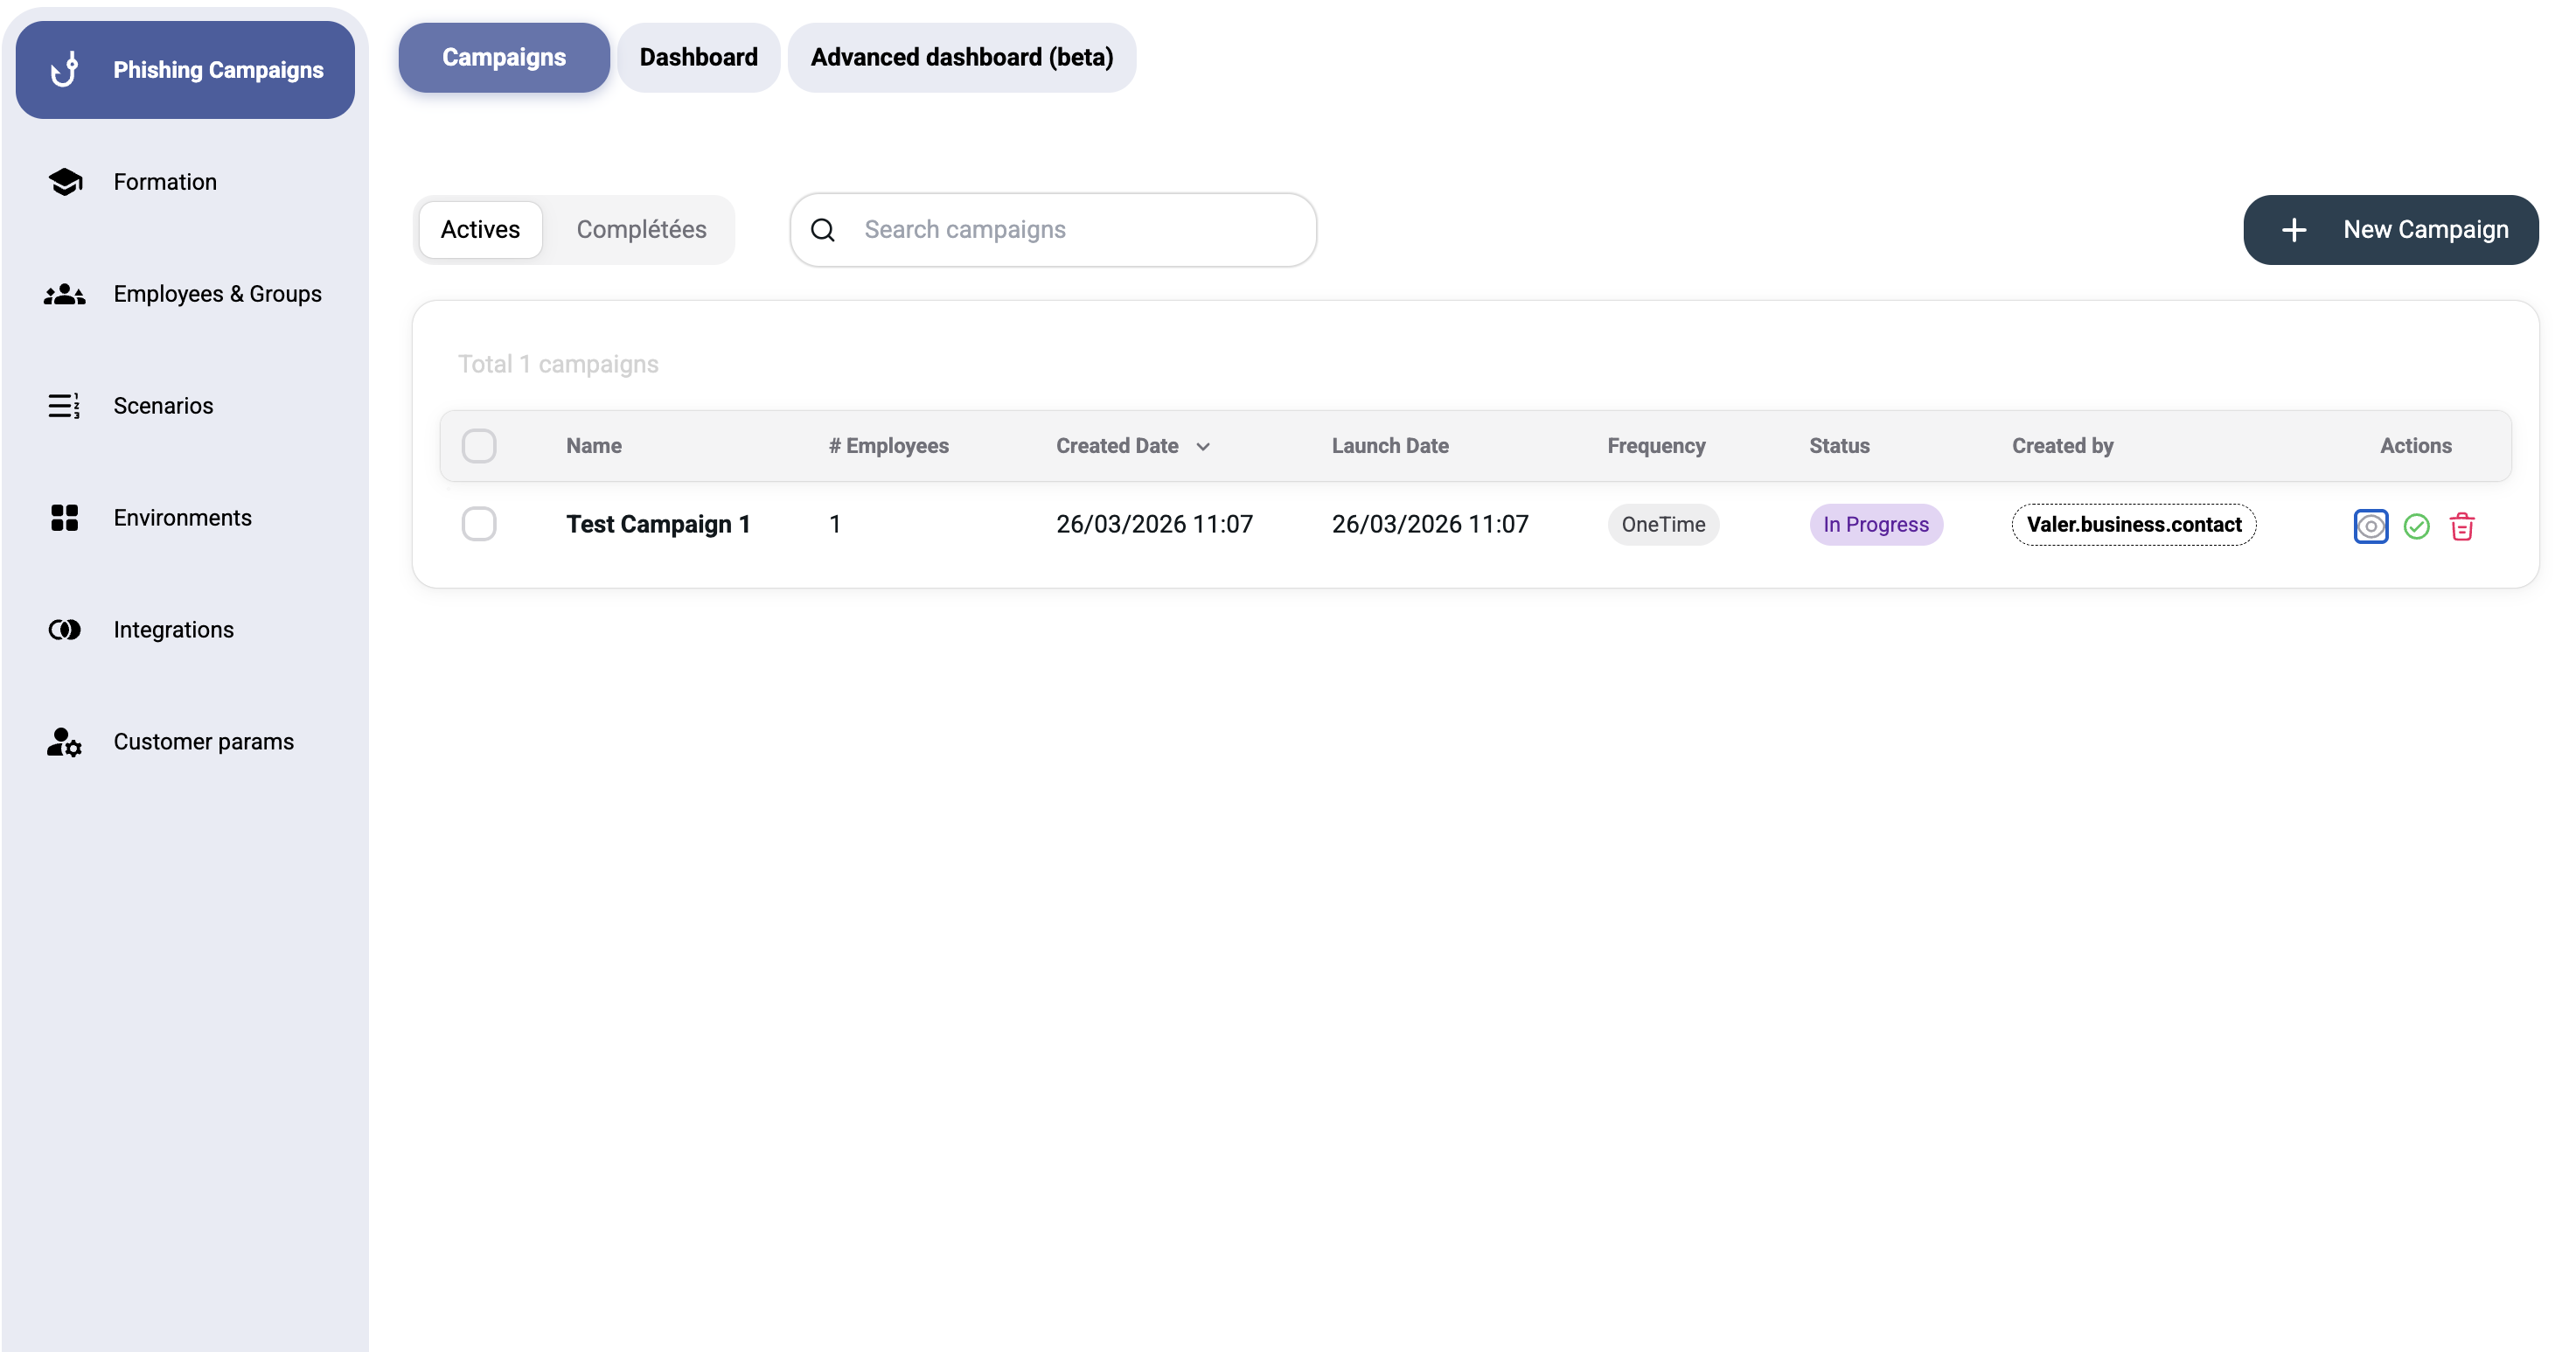
The campaigns list displays all your phishing simulations in a table with the following columns:
| Column | Description |
|---|---|
| Name | Campaign name |
| # Employees | Number of targeted employees |
| Created Date | When the campaign was created |
| Launch Date | Scheduled or actual launch date |
| Frequency | One-time or recurring schedule |
| Status | Current status (Active, Completed, etc.) |
| Created by | User who created the campaign |
| Actions | Edit, delete, or view campaign details |
¶ Filtering Campaigns
Use the tabs at the top to switch between:
- Actives — campaigns currently running or scheduled
- Complétées — completed campaigns with results
Use the Search campaigns field to filter by name.
¶ Creating a New Campaign
Click the + New Campaign button in the top-right corner. A modal dialog will open with the following sections:
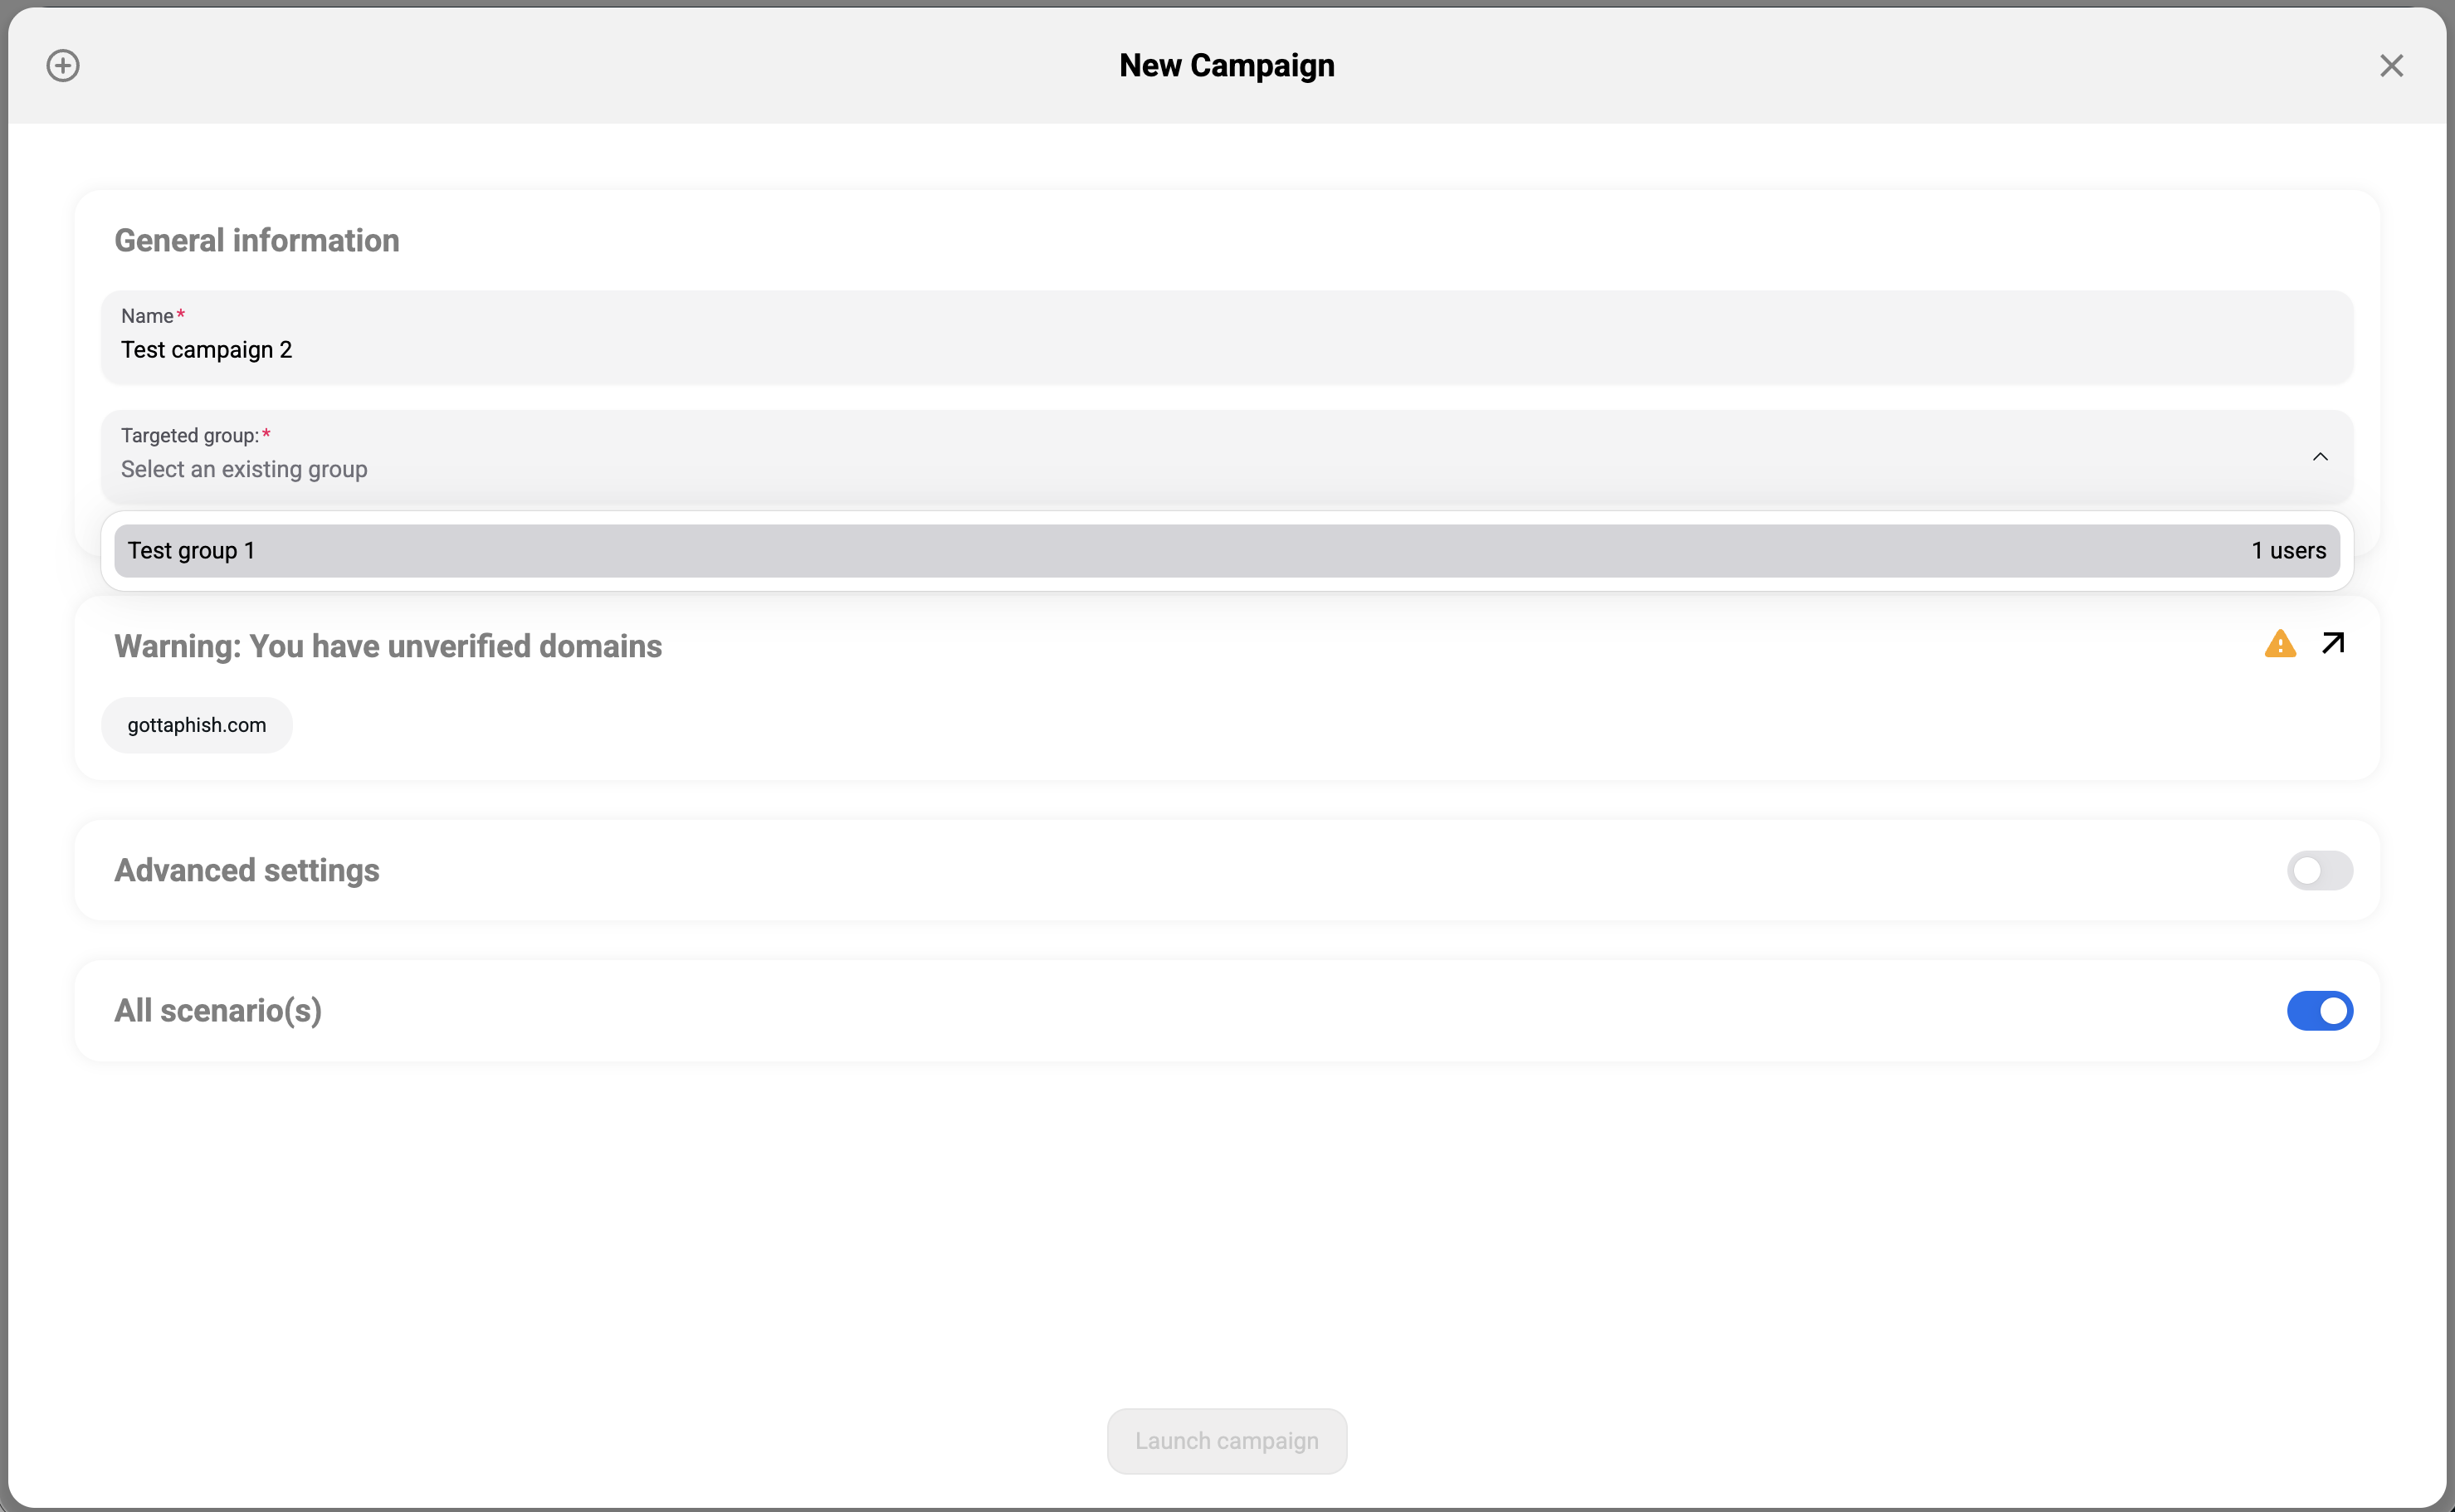
¶ General Information
| Field | Required | Description |
|---|---|---|
| Name | Yes | A descriptive name for your campaign (e.g., "Q1 2026 Security Assessment") |
| Targeted group | Yes | Select an existing employee group to target. If no groups exist, create one first in Employees & Groups |
¶ Advanced Settings
Toggle Advanced settings to reveal additional configuration:
¶ Campaign Frequency
Configure how often the campaign runs:
- One-time — sends all emails once
- Recurring — repeats at a defined interval
¶ Open Hours / Days
Restrict email delivery to business hours only:
- Monday to Friday delivery window
- Set specific start and end times to ensure emails arrive during working hours
Tip: Sending phishing simulations during business hours increases realism and improves engagement rates.
¶ Scenario Selection
- All scenario(s) toggle — when enabled, the campaign cycles through all available scenarios for the selected environment
- You can also select specific scenarios manually
Warning: You must create at least one environment and one scenario before launching a campaign. If none exist, you'll see: "You must first create environments and scenarios before launching a campaign."
¶ Launch
Click Launch campaign to start the campaign. The button is disabled until all required fields are filled and valid scenarios exist.
¶ Campaign Lifecycle
A campaign goes through these statuses:
Created → Scheduled → In Progress → Completed
| Status | Description |
|---|---|
| Created | Campaign configured but not yet launched |
| Scheduled | Campaign set to launch at a future date |
| In Progress | Emails are being sent and results are being collected |
| Completed | All emails sent and tracking period ended |
Explanation email: When marking a campaign as Completed, you can choose to send an explanation email to targets. The content and sender must be configured in advance — see Explanation Email for the full setup guide.
¶ Campaign Results & Events
Once a campaign is active or completed, you can view detailed results including:
- Email delivery status — sent, opened, clicked
- Credential capture — if the landing page captures credentials
- Employee actions — who clicked, who reported, who ignored
- IP addresses and geolocation — where clicks originated
- Timeline — chronological event log
Email Recall (API Only)
¶ For Microsoft 365 or Google API campaigns, you can withdraw emails while the status is In Progress. The timeline will show if the email was "Removed" (deleted before reading) or "Already Read".
These results feed into the Dashboard security score and analytics.
¶ Best Practices
- Start small — test with a small group before launching organization-wide
- Vary your scenarios — use different phishing themes to test multiple attack vectors
- Schedule strategically — send during business hours for realistic results
- Review results promptly — act on findings while they're fresh
- Follow up with training — use the educational close-out feature or Formation module to reinforce learning
¶ Scheduling and launching
When you create a campaign you set a send date — launch it immediately or schedule it for later. A matching preview shows which targets and groups the campaign will reach before you launch. Use Launch campaign to start it.
¶ Results and exports
From a running or finished campaign you can export its data:
- Export CSV (results) — per-target outcomes (sent, opened, clicked, reported…).
- Export CSV (timeline) — the chronological event log.
- Export PDF — a formatted report.